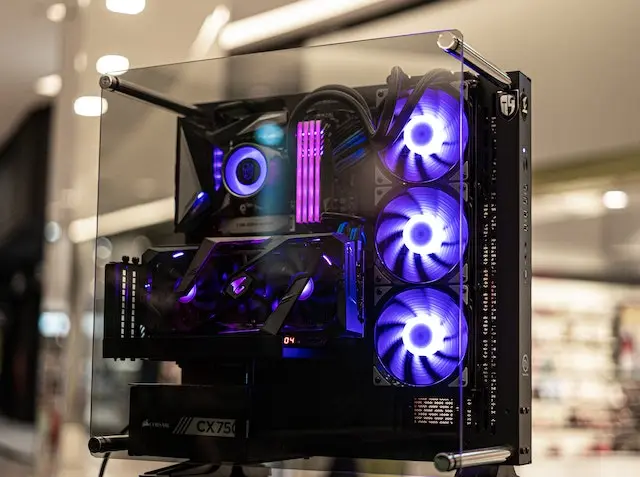
Building a gaming PC can be one of the most rewarding experiences, but it may also seem like a lot to handle if you’re new to it. It doesn’t have to be complicated, though. Whether you want to build a PC for immersive gaming or smooth performance, this guide is here to help. In this article, we are going to walk you through the steps of building your perfect gaming PC, breaking it down into simple parts, so you can confidently build the gaming rig of your dreams.
Define Your Budget and Purpose

Before diving into the details, determine what kind of performance you expect and your budget. Are you aiming for 4K gaming, or will 1080p suffice? Knowing your expectations will help guide your component choices. Allocate a portion of your budget for each key part, such as the CPU, GPU, and RAM.
For example:
- Entry-Level Build (1080p gaming): $600-$800
- Mid-Range Build (1440p gaming): $1,000-$1,500
- High-End Build (4K gaming): $2,000+
Read More: Difference Between Tablets and Smartphones
Choosing the Right CPU

Your CPU (Central Processing Unit) is the brain of your PC. It processes all the tasks that keep your system running smoothly. When picking a CPU, consider:
- Brand: Intel and AMD are the two main options. Both offer great CPUs, so choose based on your budget and needs. Tech enthusiasts can check out a comprehensive comparison by visiting TechRadar.
- Cores and Threads: More cores and threads mean better multitasking and performance. Look for a CPU with at least 6 cores for gaming.
- Compatibility: Ensure that the CPU is compatible with your motherboard.
Finding the Perfect GPU
Your GPU (Graphics Processing Unit) is critical for gaming performance. It handles all the graphics rendering, making your games look amazing. Key points to consider:
- Brand: NVIDIA and AMD dominate the market. NVIDIA cards are known for ray tracing and AI features, while AMD offers excellent performance for the price. Gamers looking for the latest GPU models should read the insights provided by PC Gamer.
- VRAM: More VRAM means better performance at higher resolutions. Aim for at least 6GB of VRAM for modern games.
- Future-Proofing: If you want your build to last, invest in a high-end GPU that can handle future games.
Selecting the Best Motherboard

Your motherboard connects all your components together. It needs to be compatible with your CPU and other parts. Things to keep in mind:
- Form Factor: ATX, Micro-ATX, and Mini-ITX are the common sizes. Choose based on your case size and expansion needs.
- Chipset: Different chipsets offer different features. Research which chipset works best with your CPU.
- Ports and Connectivity: Make sure the motherboard has enough ports for all your devices, including USB, audio, and Ethernet.
Choosing the Right RAM
RAM (Random Access Memory) helps your PC handle multiple tasks at once. The more RAM, the better your gaming experience. Consider:
- Capacity: 16GB is the standard for gaming, but 32GB offers more future-proofing.
- Speed: Faster RAM can improve performance. Aim for at least 3000 MHz.
- Compatibility: Ensure your RAM is compatible with your motherboard and CPU.
Picking the Perfect Storage Solution
Your storage determines how much data your PC can hold and how quickly it can access it. Consider:
- SSD vs. HDD: SSDs (Solid State Drives) are faster and more reliable than HDDs (Hard Disk Drives). For gaming, a combination of both is ideal: an SSD for your operating system and games, and an HDD for larger files. To understand more about the advantages of SSDs, you can explore detailed reviews at Tom’s Hardware.
- Capacity: A 1TB SSD is a good starting point, but you may need more depending on your game library.
Power Supply and Case Selection
Your power supply unit (PSU) provides the necessary power for all your components, while your case holds everything together. Things to keep in mind:
- Wattage: Ensure your PSU provides enough power for all your components. Use a PSU calculator to estimate your power needs.
- Efficiency: Look for a PSU with an 80 Plus rating for better energy efficiency.
- Case Size: Choose a case that fits your components and provides good airflow for cooling. Mid-tower cases are a popular choice.
Cooling Solutions for Your Gaming PC
Cooling is vital to keep your system running smoothly, especially during intense gaming sessions. Consider:
- Air vs. Liquid Cooling: Air cooling is cheaper and easier to install, while liquid cooling offers better performance but at a higher cost.
- Fan Placement: Make sure your case has good airflow by placing fans strategically.
- Thermal Paste: Apply thermal paste correctly to ensure efficient cooling of your CPU.
Assembling and Testing Your Gaming PC
Once you have all your components, it’s time to assemble your gaming PC. Here are the steps:
- Prepare Your Workspace: Make sure you have a clean, static-free area to work in.
- Install the CPU: Start by installing the CPU on the motherboard, followed by the RAM.
- Mount the Motherboard: Secure the motherboard inside the case.
- Install the GPU: Place the GPU in the correct PCIe slot and secure it.
- Connect Storage and Power Supply: Attach your storage drives and connect all power cables.
- Test Your Build: Before closing the case, power on your PC to check if everything is working correctly.
Conclusion
Building your gaming PC may seem like a big task, but by following these steps, you can make the process much easier. From choosing the right CPU to installing your cooling system, each decision plays a key role in building your perfect gaming rig. Once your PC is up and running, you can enjoy a gaming experience designed exactly to your preferences. Happy gaming!

